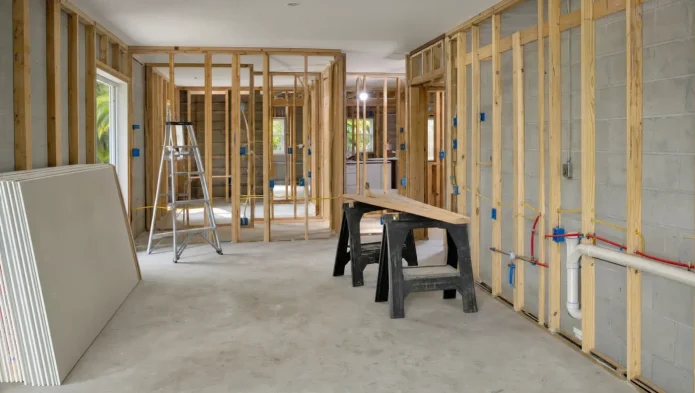

Drywall choices look simple until paint flashes in the afternoon sun or a bathroom seam telegraphs through new tile. Fort Worth homes see big temperature swings, summer humidity, and plenty of bright light, which all reveal small mistakes. A better approach is to plan assemblies, finish levels, and schedule details room by room. That means matching gypsum panels to moisture or fire needs, picking joint treatments that resist cracking, and setting a curing plan that suits local weather. Done well, you get flatter walls, cleaner corners, and a finish that holds up to daily use, not just the day it is painted.
- Pick the Right Panel for Each Space
Start where performance requirements are clear. Bathrooms and laundry rooms deserve moisture-resistant panels, such as green board or fiberglass-faced gypsum, on walls outside direct wet zones. Inside showers or behind a tub surround, use cement board with an appropriate waterproofing system rather than ordinary drywall to resist prolonged water exposure. In attached garages or rooms with a fireplace chase, a layer of Type X fire-rated drywall is commonly required on walls and ceilings that separate living areas from potential ignition sources. For ceilings with framing spaced at 24 inches on center or for rooms where sound control matters, 5/8 inch panels resist sagging and help with acoustics, while 1/2 inch panels remain appropriate for most interior walls.
If you are weighing code details, penetrations, or where to transition from cement board to drywall, ask a local pro. A straightforward way to align selections with city requirements and your design is to consult a “drywall contractor in Fort Worth” early in planning so mechanical rough-ins and wallboard types do not fight each other later.
- Framing, Fastening, and Jointing Choices That Reduce Callbacks
Cracks and nail pops often trace back to fastening and joint strategy. On wood framing, use coarse-thread drywall screws long enough to penetrate studs by at least 5/8 inch: 1 1/4 inch for 1/2 inch board and 1 5/8 inch for 5/8 inch board. Keep screw heads slightly dimpled without breaking the paper face, and hold edge fasteners back the proper distance to avoid crumbling. Stagger butt joints so they do not cluster over door headers or window corners, where seasonal movement is greatest. When a room has multiple butt joints on the same wall, adding backing behind the joints can flatten those joints and prevent future ridges.
Taping method matters, too. Paper tape with all-purpose joint compound gives strong tapered joints on new work, while fiberglass mesh can be helpful on repairs when paired with a setting-type compound. Setting-type compounds, often called hot mud, generate less shrinkage on the first coat and are handy when humidity runs high, but they require timely mixing and cleanup. Outside corners are only as good as the bead: metal corner bead holds straight lines in areas with frequent foot traffic, vinyl bead resists corrosion near moisture, and adjustable bead helps where framing is out of square. Each of these choices cuts the chance that a small bump turns into a visible seam after paint.
- Finish Level and Texture Under Real Light
Not every room needs the same level of finish. Level 3 (taped with one coat) supports heavier textures and areas often hidden by cabinets. Level 4 is the standard for most painted walls where light is moderate, and the paint sheen is eggshell or lower. Level 5 adds a skim coat over the entire surface to create an ultra-flat substrate, which pays off where raking light from large windows or glossy paint would magnify minor waves. In Fort Worth’s bright rooms, a hallway with windows facing west may require Level 5 to avoid flashing that would not show in a shaded bedroom.
Texture is a tool, not a way to conceal poor workmanship. A fine orange peel softens transitions and hides small defects while still allowing clean repaints. Knockdown creates a more pronounced pattern that disguises flaws but can date a room if design preferences change. The tradeoff is time and touchups: a Level 5 smooth finish demands more labor up front yet makes future color changes easier, while a heavier texture is faster to apply but can limit later design updates. Either path benefits from a proper sealing coat so the finish looks consistent in real daylight, not just under work lights.
- Sound, Fire, and Attached Garage Considerations
Rooms that border a garage, media spaces, or home offices may call for smarter assemblies. A common upgrade is 5/8 inch Type X board with joints treated as required by the applicable fire separation assembly on the garage side for code compliance, paired with an insulated stud bay and sealed penetrations. For sound control, resilient channel installed perpendicular to studs decouples the drywall from framing to cut vibration transfer. Adding a second layer of 5/8 inch drywall with a viscoelastic damping compound between layers can further reduce noise without relying on complicated framing changes.
These assemblies have trade-offs. Heavier boards and double layers add weight and require longer screws; outlets and window returns may need extension rings or deeper jambs. Plan door selections, weatherstripping, and thresholds with the same attention as the wall assembly, or the benefits of added mass and decoupling will be undermined by gaps and lightweight doors.
Sequencing, Curing, and Paint Prep in North Texas Humidity
Even the right materials underperform if the sequence is rushed. Get plumbing, electrical, HVAC, and low-voltage rough-ins sealed and inspected before hanging board. In summer, control moisture from new concrete, fresh mud, or rain by running the AC or dehumidifiers during taping and sanding. When humidity is high, a setting-type compound for the first coat can help reduce shrinkage and schedule delays, with lightweight or all-purpose compounds for subsequent coats to ease sanding. Never close up walls that still read damp on a moisture meter, or you risk joint bubbling and mildew later.
For paint readiness, start with a quality PVA primer to seal paper and compound so your topcoat does not flash. Skipping primer or mixing brands haphazardly is a frequent mistake that shows as dull patches or uneven sheen. Before painting, skim problem areas under strong raking light, not just overhead lighting. After moving in, use studs or proper anchors for heavy shelves to avoid gypsum damage, and expect minor seasonal hairline cracks at door corners or long spans; they are usually cosmetic and easy to fill with a flexible, paintable caulk or a light spackling compound during routine touchups.
Ahead of any remodel or new build, decide by room how each wall has to perform, then pick materials and a finish level that support that goal. Moisture-resistant panels where needed, strong joints with the right tape and compound, and a finish tailored to your light and paint sheen make the difference between “good enough” and work that holds up. Plan the sequence so drying conditions match the season, and keep an eye on fire and sound needs at shared walls. Those choices cost less to make on paper than they do after the first coat of paint proves them wrong.
<iframe src=”https://www.google.com/maps/embed?pb=!1m18!1m12!1m3!1d3355.499702283776!2d-97.3312651!3d32.7524729!2m3!1f0!2f0!3f0!3m2!1i1024!2i768!4f13.1!3m3!1m2!1s0x864e71bdf9c1e259%3A0x77f18719534e1302!2sDFW%20Superior%20Drywall%20Pros%20of%20Fort%20Worth!5e0!3m2!1sen!2sus!4v1794076268254!5m2!1sen!2sus” width=”600″ height=”450″ style=”border:0;” allowfullscreen=”” loading=”lazy” referrerpolicy=”strict-origin-when-cross-origin”></iframe>