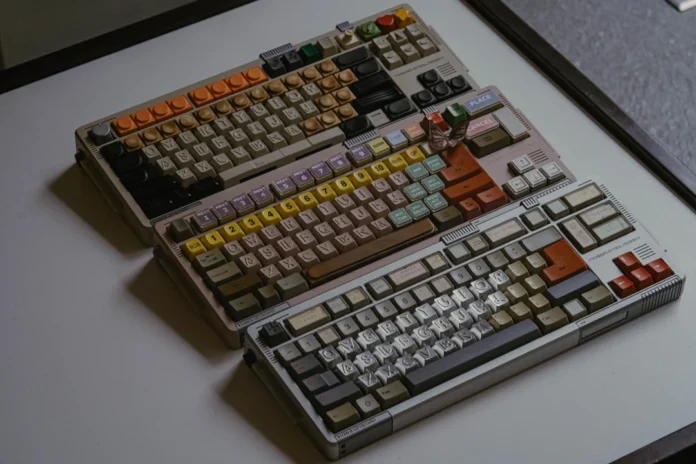

A mechanical keyboard kit gives you a middle ground between buying a completely pre-built keyboard and designing every component from scratch. Instead of accepting the switches, keycaps, case, and typing feel chosen by a manufacturer, you can select the parts that match the way you actually use your keyboard.
For a first build, that might mean a hot-swappable PCB, a 75% layout, smooth linear switches, and PBT keycaps. For a more advanced build, you might experiment with different plates, mounting systems, stabilizers, foam, or even custom firmware.
The appeal is not simply having a keyboard that looks different. The right mechanical keyboard kit can let you adjust the sound, feel, layout, and appearance around your daily workflow.
That flexibility is one reason custom keyboards have developed such a strong enthusiast community. In real-world beginner discussions, users frequently prioritize hot-swap support and familiar layouts such as 75% and TKL because they make experimentation easier without requiring soldering.
If you are ready to compare different options, you can explore a range of mechanical keyboard kit configurations before deciding which combination fits your setup.
Why Choose a Mechanical Keyboard Kit Instead of a Pre-Built Keyboard?
A pre-built keyboard is convenient: plug it in, choose your preferred connection mode, and start typing. A mechanical keyboard kit takes a different approach. It gives you more control over the components that determine how the keyboard feels and sounds.
For example, two keyboards with the same 75% layout can feel noticeably different because they use different switches, plates, mounting systems, keycaps, and case materials.
A kit can also make more sense if you already know what you dislike about your current keyboard. Maybe the switches are too loud, the layout wastes desk space, or the keycaps feel slippery. Instead of replacing the entire keyboard, you can build around those preferences.
What Can You Customize With a Mechanical Keyboard Kit?
Depending on the kit, you may be able to customize:
Case material and color
PCB and connectivity
Switch type
Keycap material and profile
Plate material
Mounting style
Stabilizers
Sound-dampening materials
Firmware and key assignments
Hot-swappable PCBs are particularly useful for beginners because they allow compatible switches to be changed without soldering. RTINGS also lists hot-swappable PCBs as an important feature to consider when choosing a mechanical keyboard.
Is Building a Custom Keyboard Worth the Extra Effort?
It depends on what you want from your keyboard.
If you simply need an inexpensive keyboard for occasional use, assembling a kit may not be necessary. But if you type for several hours a day, play games regularly, or enjoy customizing your desktop, the extra effort can be part of the value.
A mechanical keyboard kit also gives you the opportunity to change individual components later. Your first build does not necessarily have to be your final configuration.
How Do You Customize a Mechanical Keyboard Kit?
The easiest way to approach a custom build is to work from the typing experience rather than starting with appearance.
First, decide how you will use the keyboard. A programmer or writer may prioritize comfortable typing and clear feedback. A competitive gamer may prefer a smooth linear switch and compact layout. Someone working in a shared office may put greater emphasis on controlling noise.
Next, choose the keyboard layout. A 60% board saves desk space, while 65%, 75%, and TKL layouts retain progressively more navigation or function keys.
After that, choose your switches and keycaps. These two components have a major influence on the physical and acoustic character of the keyboard.
Finally, consider the plate, mounting style, stabilizers, and dampening. These details can change the overall experience without changing the basic layout.
A useful beginner strategy is to avoid changing everything at once. Start with a hot-swap mechanical keyboard kit and a switch/keycap combination you already understand. Once you have used it for a few weeks, you will have a much better idea of what you actually want to modify.
How Do You Choose Between Linear, Tactile, and Clicky Switches?
Mechanical switches generally fall into three broad categories: linear, tactile, and clicky. RTINGS’ switch testing similarly uses these categories when comparing mechanical switches.
| Switch type | Feel | Sound tendency | Common use |
| Linear | Smooth, consistent | Usually moderate to low | Gaming, general typing |
| Tactile | Noticeable bump | Moderate | Typing, programming, general use |
| Clicky | Tactile with audible click | Usually louder | Enthusiast typing, private spaces |
Linear switches move smoothly without a tactile bump. Many gamers like their consistent motion, while some typists appreciate the uninterrupted keystroke.
Tactile switches provide a bump during the keypress. This feedback can make it easier to recognize actuation without relying entirely on bottoming out the key.
Clicky switches add an intentional audible click. They can be enjoyable at home, but the sound may be distracting in an office or shared room. RTINGS notes that clicky switches can be disruptive in enclosed environments.
There is no universally correct switch. If possible, test a few switch samples before buying a full set.
How Do Keycap Profiles and Materials Change the Typing Experience?
Keycaps affect both your fingers and the sound of the keyboard.
Common materials include ABS and PBT. ABS keycaps can have a smooth surface and are often associated with brighter sound characteristics, while PBT is commonly chosen for its textured feel and resistance to developing a polished surface over time.
Profile matters too. Cherry, OEM, XDA, SA, and other profiles have different heights and shapes. A lower or flatter profile may feel familiar to someone coming from a laptop keyboard, while taller sculpted profiles can create a more pronounced mechanical-keyboard feel.
When choosing keycaps, check the set’s compatibility rather than focusing only on the appearance. Some layouts require additional keys or specific sizes for Shift, Enter, Backspace, or bottom-row keys.
Which Mechanical Keyboard Kit Layout and Mounting Style Should You Choose?
Layout is one of the first decisions you will notice every day.
A smaller keyboard can create more mouse space and make a desk look cleaner, but removing keys can increase the number of shortcuts you need to learn. A larger layout provides more dedicated keys but takes up more space.
The best choice depends heavily on your workflow.
What Are the Differences Between 60%, 65%, 75%, and TKL Kits?
60% keyboards usually remove the dedicated function row, arrow keys, and navigation cluster. They are compact and popular with users who rely on layers and shortcuts.
65% keyboards add dedicated arrow keys and commonly include a small navigation cluster while remaining compact.
75% keyboards retain the function row in a condensed layout. This makes them particularly attractive to people who want a smaller board without giving up the F-row.
TKL, or tenkeyless, removes the number pad while keeping the function row, arrow keys, and navigation cluster.
For a first mechanical keyboard kit, 75% and TKL can be practical starting points because they retain many familiar keys. This matches the concerns raised in beginner keyboard discussions, where users often look for these layouts while learning the hobby.
How Do Different Mounting Styles Affect Typing Feel?
The mounting system determines how the plate and PCB interact with the keyboard case.
Common approaches include:
Top mount: The plate is secured to the upper part of the case and can provide a relatively firm, consistent feel.
Gasket mount: The plate or PCB is supported by flexible gasket material, which can produce a softer typing experience.
O-ring mount: O-rings provide another form of flexible support and can change the board’s overall feel.
Tray mount: A simpler construction where mounting points attach the PCB or plate to the case.
There is no single mounting style that automatically produces the best keyboard. Alexotos’ hands-on testing of current custom boards illustrates how different mounting systems, including gasket and gummy O-ring designs, can become a significant part of a keyboard’s typing character.
How Can You Make a Mechanical Keyboard Kit Sound and Feel Better?
Once the basic components are compatible, small modifications can make a noticeable difference.
The important thing is to change one variable at a time. If you add multiple layers of foam, change the plate, lubricate the switches, and replace the keycaps simultaneously, it becomes difficult to know which modification actually helped.
For example, if your keyboard sounds too hollow, case or PCB foam may be worth testing. If the stabilizers sound rattly, tuning them may be more useful than adding another layer of dampening.
Do Foam, Lubing, and Stabilizer Modifications Make a Difference?
Foam can reduce unwanted resonance inside the case. Different foam materials and thicknesses produce different results, so more foam is not automatically better.
Switch lubrication can reduce friction between moving components and potentially create a smoother keystroke. However, over-lubricating a switch can negatively affect its feel, so beginners should use an appropriate lubricant and apply it carefully.
Stabilizer tuning is especially noticeable on larger keys such as Space, Enter, Backspace, and Shift. Poorly tuned stabilizers can create ticking or rattling noises even when the smaller keys sound good.
If your first build already feels smooth and controlled, you may not need extensive modification. Customization works best when it solves a specific problem rather than becoming a checklist.
How Can You Reduce Keyboard Noise and Improve Acoustics?
Start by identifying where the noise comes from.
Switches create part of the sound, but keycaps, stabilizers, the plate, PCB, and case can all contribute. Bottom-out and top-out sounds may also be more noticeable than the switch’s own actuation sound.
If you share a room or work in an office, consider linear or quieter tactile switches instead of clicky models. RTINGS’ testing notes that linear switches are often among the quieter mechanical options, while clicky switches tend to be more noticeable to people nearby.
You can also experiment with:
Case foam
PCB foam
Plate foam
Switch films
Lubricated stabilizers
Different keycap materials
A different plate material
Keep in mind that acoustic preferences are subjective. A deep, muted sound that one person describes as satisfying may sound too dull to another.
What Should You Check Before Building Your Final Keyboard?
Before purchasing every component, create a compatibility checklist.
At minimum, verify the PCB, plate, case, switches, stabilizers, keycaps, and connection method.
Do not assume that components from different manufacturers will automatically fit together. A keyboard may have a familiar layout while still using a PCB or plate with unusual mounting holes, stabilizer requirements, or bottom-row dimensions.
How Do You Test Compatibility Between Components?
Check these specifications before ordering:
PCB and case compatibility — confirm the PCB physically fits the case.
PCB and plate compatibility — mounting holes and layout need to match.
Switch compatibility — check whether the PCB accepts the switch’s pin configuration.
Keycap compatibility — verify stabilizer keys and non-standard key sizes.
Stabilizer compatibility — make sure the stabilizers match the PCB and plate.
Firmware support — check whether the PCB supports the configuration software you plan to use.
For a beginner, a kit with clearly documented compatibility can remove much of the guesswork. Hot-swap support is also useful when you want to experiment with different switches without rebuilding the PCB.
Conclusion
Building a mechanical keyboard does not have to mean becoming an expert in soldering, firmware, or keyboard acoustics overnight.
A good mechanical keyboard kit gives you a manageable way to learn. Start with the layout that fits your desk, choose switches based on how you actually type or play, select compatible keycaps, and then fine-tune the sound and feel if necessary.
For many first-time builders, a hot-swappable 65%, 75%, or TKL kit offers a practical balance between customization and simplicity. As you gain experience, you can explore different mounting systems, plates, stabilizers, foam, and switch modifications.
The most useful custom keyboard is ultimately the one that fits your hands, workspace, and daily habits—not necessarily the one with the most expensive components.
FAQs
What is the easiest mechanical keyboard kit to customize?
A hot-swappable mechanical keyboard kit is generally one of the easier options for beginners because compatible switches can be installed and replaced without soldering. A 65%, 75%, or TKL layout can also be easier to transition to if you are coming from a conventional keyboard.
Can I use any switches with a mechanical keyboard kit?
No. Switch compatibility depends on the PCB and socket design. Many hot-swap PCBs support common MX-style mechanical switches, but you should still check the manufacturer’s specifications for pin configuration and compatibility before purchasing switches.
How can I make my mechanical keyboard kit sound better?
Start with the source of the unwanted sound. Stabilizer tuning can address rattling, while switch lubrication may improve smoothness. Case or PCB foam can change resonance, and different switches, plates, or keycaps can significantly alter the overall sound profile.
Rather than adding every available modification, make one change at a time and listen to the result. This makes it easier to build a sound profile that matches your personal preference.