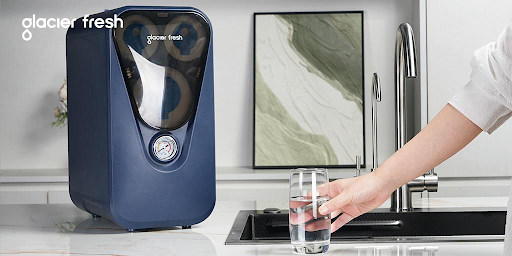

Clean drinking water is one of the most important necessities in every home. Many families rely on municipal tap water for daily use, but concerns about contaminants, chlorine, heavy metals, and unpleasant taste have encouraged homeowners to search for better filtration solutions. One of the most effective options available today is an under sink reverse osmosis system.
A reverse osmosis system under sink uses advanced filtration technology to remove impurities from water while improving taste, odor, and overall quality. These systems are installed beneath the kitchen sink and provide purified water through a dedicated faucet. Because they remain hidden under the sink, they help maintain a clean and organized kitchen appearance while offering easy access to safe drinking water.
Many homeowners believe installing an under sink reverse osmosis system is difficult, but modern systems are designed to make installation much easier than before. Most units include detailed instructions, installation kits, under sink reverse osmosis system and user-friendly components suitable even for beginners.
Understanding the installation process is important because proper setup ensures the system works efficiently and safely. Incorrect installation may cause leaks, reduced water pressure, or poor filtration performance. Fortunately, with careful preparation and basic tools, many homeowners can successfully install a reverse osmosis system themselves.
This article provides a beginner-friendly guide to installing an under sink reverse osmosis system. We will discuss how the system works, tools needed for installation, step-by-step setup instructions, common mistakes to avoid, maintenance tips, and why proper installation matters for long-term performance.
Understanding the Components of a Reverse Osmosis System Under Sink
Before starting the installation process, it is important to understand the main parts of an under sink reverse osmosis system. Knowing the purpose of each component makes installation easier and helps beginners feel more confident during setup.
The first major component is the filtration unit itself. Most systems contain multiple filters, including a sediment filter, carbon filters, and the reverse osmosis membrane. These filters work together to remove contaminants and improve water quality.
The sediment filter removes larger particles such as dirt, rust, and sand from the water supply. Carbon filters reduce chlorine, odors, and chemicals that affect water taste and quality.
The reverse osmosis membrane is the most important part of the system. It removes microscopic contaminants such as lead, fluoride, nitrates, arsenic, and dissolved solids.
Another important component is the storage tank. Purified water is stored in this tank until needed. When the faucet is opened, water flows from the tank directly to the user.
The dedicated faucet is installed separately from the main kitchen faucet and is specifically used for dispensing purified water.
The system also includes tubing, fittings, a drain connection, and a feed water adapter that connects the unit to the cold water supply.
Some advanced reverse osmosis systems under sink may include additional features such as remineralization filters, UV sterilizers, or leak detection systems.
Understanding these components before installation helps beginners follow instructions more easily and identify parts correctly during setup.
Tools and Preparation Before Installation
Proper preparation is one of the most important parts of installing an under sink reverse osmosis system successfully. Before beginning installation, homeowners should gather all required tools and carefully review the manufacturer’s instructions.
Most installations require basic household tools such as an adjustable wrench, screwdriver, drill, utility knife, and pliers. Some systems may also require a hole saw if a new faucet hole needs to be created in the sink or countertop.
Before starting the installation process, homeowners should empty the cabinet beneath the sink to create enough working space. Cleaning the area beforehand also helps make installation more comfortable.
It is important to shut off the cold water supply before disconnecting any plumbing connections. Many kitchens have shut-off valves located beneath the sink for this purpose.
Beginners should also inspect the available space beneath the sink to ensure there is enough room for the filters, storage tank, and tubing. Compact kitchens may benefit from space-saving or tankless reverse osmosis systems.
Carefully checking all included components before starting installation is also recommended. Missing fittings or damaged parts can delay the installation process.
Some homeowners prefer placing towels or containers beneath plumbing connections to catch small amounts of water that may spill during installation.
Proper preparation reduces installation stress and helps beginners complete the process more safely and efficiently.
Installing the Feed Water Adapter
The first major installation step for an under sink reverse osmosis system involves connecting the feed water adapter to the cold water supply line. This adapter directs water from the household plumbing into the filtration system.
To begin, homeowners should turn off the cold water supply valve beneath the sink. After shutting off the water, the kitchen faucet should be opened briefly to release any remaining pressure in the line.
Next, the cold water supply line is disconnected carefully using an adjustable wrench. The feed water adapter is then attached between the shut-off valve and the faucet supply line.
Once properly connected, the tubing leading to the reverse osmosis system is attached to the adapter fitting. Most modern systems use quick-connect fittings that simplify the process for beginners.
After tightening the connections securely, homeowners should double-check for proper alignment to avoid leaks later.
This step is extremely important because the feed water adapter controls the flow of water entering the reverse osmosis system under sink. Incorrect installation may reduce water flow or create leakage problems.
Modern installation kits are designed to simplify this process, making it manageable even for first-time installers.
Installing the Reverse Osmosis Faucet
A reverse osmosis system under sink requires a separate faucet dedicated to dispensing purified water. Installing this faucet is one of the most noticeable parts of the installation process.
Some kitchen sinks already contain an unused hole that can be used for the reverse osmosis faucet. If no extra hole is available, homeowners may need to drill a new opening in the sink or countertop.
Before drilling, it is important to verify the material of the sink or countertop because different surfaces require different drilling methods and tools. Stainless steel sinks are generally easier to drill than stone countertops.
Once the opening is prepared, the faucet is inserted into the hole from above the sink. Mounting hardware is then secured beneath the sink to hold the faucet firmly in place.
Tubing from the reverse osmosis system is connected to the faucet according to the manufacturer’s instructions. Properly securing these connections helps prevent leaks and ensures smooth water flow.
The faucet should be positioned conveniently for daily use while maintaining a clean and attractive kitchen appearance.
Installing the dedicated faucet allows homeowners to separate purified drinking water from regular tap water easily.
Connecting the Drain Line and Storage Tank
The drain line and storage tank are essential components of an under sink reverse osmosis system. Proper installation of these parts ensures efficient system performance and safe wastewater disposal.
The drain line removes contaminants flushed away during the reverse osmosis process. Most systems include a drain saddle clamp that attaches to the sink drainpipe beneath the sink.
To install the drain saddle, homeowners position it above the sink’s trap and drill a small hole into the drainpipe. The saddle clamp is then secured around the pipe, and the drain tubing is connected to the fitting.
Proper alignment of the drain line helps prevent noise, clogs, or drainage issues during system operation.
The storage tank is typically placed beneath the sink near the filtration unit. Teflon tape is often applied to the tank threads before attaching the tank valve securely.
Tubing from the filtration system is then connected to the storage tank. This tank stores purified water until it is needed, ensuring consistent water flow from the faucet.
Beginners should ensure all tubing connections are secure and free from sharp bends that could restrict water flow.
Proper installation of the drain line and storage tank is essential for smooth and reliable operation of the reverse osmosis system under sink.
Flushing and Testing the System
After all components are connected, the reverse osmosis system must be flushed and tested before normal use. This step removes air, manufacturing residues, and loose carbon particles from the filters.
The cold water supply valve is slowly turned back on while carefully checking all fittings and tubing for leaks. Small leaks should be corrected immediately by tightening connections properly.
The storage tank valve is usually left closed during the initial flushing process. Water is allowed to run through the system and exit through the faucet for several minutes.
This initial flushing helps clean the filters and prepare the system for normal operation. The water may appear cloudy or contain small carbon particles during the first flush, which is normal.
After flushing, the storage tank valve is opened, allowing the tank to fill with purified water. This process may take several hours depending on system capacity and water pressure.
Once the tank is full, the water should be completely drained to remove any remaining impurities from the installation process. Many manufacturers recommend repeating this process once or twice before drinking the water.
Testing the system carefully ensures that the reverse osmosis system under sink operates properly and provides clean purified water safely.
Common Installation Mistakes Beginners Should Avoid
Beginners installing an under sink reverse osmosis system should be aware of common mistakes that can affect system performance or cause leaks.
One common mistake is failing to shut off the water supply completely before disconnecting plumbing lines. This can lead to unnecessary water spills and confusion during installation.
Improperly tightened fittings are another frequent issue. Loose fittings may leak, while over-tightening can damage plastic connectors or tubing.
Incorrect tubing connections can also cause problems. Beginners should carefully follow the manufacturer’s diagrams to ensure each tube connects to the correct component.
Another mistake is placing tubing in positions where it may kink or become pinched. Restricted tubing can reduce water flow and system efficiency.
Failing to flush the system properly after installation may leave carbon particles or manufacturing residues inside the filters.
Some homeowners also forget to check storage tank pressure or neglect routine maintenance after installation.
Avoiding these mistakes helps ensure the reverse osmosis system under sink operates efficiently and provides reliable purified water for years.
Maintenance Tips After Installation
Installing the system correctly is only the beginning. Regular maintenance is essential for keeping an under sink reverse osmosis system working efficiently over the long term.
Sediment and carbon filters typically require replacement every six to twelve months depending on water quality and usage. The reverse osmosis membrane generally lasts two to three years before replacement becomes necessary.
Homeowners should monitor water taste, odor, and flow rate because noticeable changes may indicate that filters need replacement.
Checking for leaks periodically is also important. Even small leaks should be repaired quickly to prevent cabinet damage beneath the sink.
Some homeowners sanitize the system annually to maintain water quality and prevent bacterial buildup.
Modern systems often include filter replacement indicators or smart monitoring systems that help simplify maintenance schedules.
Proper maintenance ensures that the reverse osmosis system under sink continues providing clean and healthy water while extending system lifespan.
Conclusion
Installing an under sink reverse osmosis system may seem challenging at first, but modern systems are designed to make the process manageable even for beginners. With proper preparation, careful attention to instructions, and basic household tools, many homeowners can successfully complete the installation themselves.
Understanding the system components, preparing the workspace, connecting the water supply, installing the faucet, and properly flushing the system are all important steps for achieving reliable performance.
A correctly installed reverse osmosis system under sink provides numerous benefits, including cleaner drinking water, improved taste, reduced contaminants, and long-term savings compared to bottled water.
Regular maintenance and proper care ensure the system continues operating efficiently for many years while supporting healthier hydration and cooking habits.
As awareness about water quality continues to grow, reverse osmosis system under sink more homeowners are choosing reverse osmosis systems as trusted solutions for safe and purified drinking water.
For beginners seeking an effective and convenient home water filtration system, installing an under sink reverse osmosis system is a valuable investment that improves both kitchen functionality and overall family health.
,