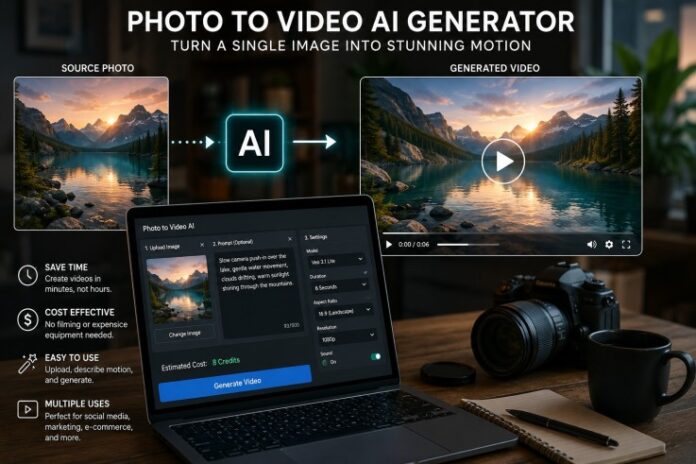

A strong photograph can capture a product, person, or moment perfectly, yet it remains fixed in a single frame. Turning that image into a video traditionally requires filming, keyframe animation, editing software, and considerable production time. AI changes that workflow by using the original image as a visual anchor and generating movement around it.
A photo to video AI generator can animate portraits, product photography, illustrations, landscapes, and AI-created artwork without requiring a camera or timeline-based editor. You provide the source image, describe the movement you want, select an appropriate model, and generate a short video ready for review.
The process is accessible, but good results still depend on the choices you make. Image quality, motion direction, model selection, duration, resolution, and aspect ratio all influence the final output.
Why Use a Photo to Video AI Generator?
The main advantage is not simply that the image moves. It is the ability to create a new video asset from visual material you already own.
An online generator can help a retailer animate an existing product photo, let a creator turn a portrait into a vertical social clip, or give an illustrator a way to add atmosphere to finished artwork. Because the uploaded image supplies the subject, colors, textures, and composition, your prompt can concentrate on movement instead of reconstructing the entire scene.
This is useful when producing multiple campaign variations. A single product photograph might become a widescreen website banner, a vertical social video, and a square carousel asset. Each version can use a different motion direction while retaining the same recognizable starting image.
The technology does have limits. Crowded scenes, hidden faces, small subjects, heavy compression, and several simultaneous movements can make the generated frames less stable. A practical workflow treats the first result as a draft that can be refined.
Choosing a Model and Understanding Its Parameters
Photo to Video AI provides a model selector rather than locking every project to one generation engine. Its supported catalog includes options from families such as Google Veo 3.1, Kling 2.6 and 3.0, ByteDance Seedance, and Wan 2.6. The wider studio configuration also supports additional video models for specialized workflows.
The model menu matters because settings are model-specific. Duration, available resolutions, aspect ratios, sound generation, and frame controls are not identical across every option. The interface calculates and displays the credit cost before generation, allowing you to compare a draft configuration with a higher-quality one.
Veo 3.1 Lite is configured as the default image-to-video model. Its available controls include 4-, 6-, and 8-second durations; Auto, 16:9, and 9:16 framing; and 720p, 1080p, or 4K resolution choices. The site’s starting configuration uses 720p to keep the first experiment economical.
Kling 3.0 offers another control pattern. Its video length can range from 3 to 15 seconds, while its modes include Standard, Professional, and 4K. Sound can be switched on or off. When an image is uploaded, the video ratio follows that image, so the aspect-ratio control becomes locked rather than forcing a crop that conflicts with the source.
MiniMax H3 supports 768p and 2K output with durations from 4 to 15 seconds. These examples illustrate why you should review the controls after changing models. A parameter available on one model may be restricted, renamed, or automatically derived on another.
How to Turn a Photo into a Video
Step 1: Create an Account and Open the Generator
Start by opening the photo to video ai generator and signing in. Anonymous generation is not supported, but a free account receives trial credits without requiring a credit card.
Free-credit videos include a small watermark and are intended for evaluation. Paid plans unlock watermark-free output, higher-resolution publishing options, and commercial-use rights. You should also make sure you have permission to use the uploaded photograph, especially for client work or advertising.
Step 2: Upload a Clear Source Image
Upload one JPG, PNG, or WEBP image. Each generation currently converts one photo into one video. If you have several photographs, generate them separately with an individual prompt and settings for each image; simultaneous batch conversion is not currently available.
Choose a sharp, well-lit image with a clearly visible subject. A portrait should not have important facial features hidden by hair, hands, or foreground objects. A product should be large enough in the frame for its shape and surface details to remain identifiable.
Busy backgrounds and several competing subjects create more opportunities for visual changes between frames. When possible, begin with a simple composition and visible separation between the subject and background.
Step 3: Describe Movement Instead of Rewriting the Photograph
The uploaded image already tells the model what the scene looks like. Your prompt should explain what changes over time.
A weak prompt might say, “Make this picture cinematic.” That direction does not identify the desired subject action, camera behavior, or environmental motion.
A stronger prompt would be:
“Subtle head turn and natural blinking, soft hair movement in a light breeze, slow camera push-in, warm golden-hour light.”
For a product photograph, you might write:
“Slow camera orbit around the product, gentle reflections moving across the surface, soft background light shift, stable logo and product shape.”
Keep the number of actions manageable. Asking for a camera orbit, dramatic subject movement, flying particles, changing weather, and a complete lighting transformation in the same short clip may reduce consistency.
The homepage presents the motion prompt as optional and can let the selected model infer movement. However, model requirements can differ, so follow the prompt field shown for the model you select.
Step 4: Choose Duration, Resolution, Ratio, and Sound
Match the settings to the purpose of the video. A short, lower-resolution draft is useful for testing the motion direction before spending more credits on a final version.
Use 9:16 for vertical platforms such as TikTok, Instagram Reels, and YouTube Shorts. Choose 16:9 for YouTube, presentations, website headers, and display advertising. A 1:1 option is available on supported models for product pages and square social placements.
Not every model offers every ratio. Some models inherit the proportions of the uploaded image, while others provide Auto or explicit aspect-ratio choices. Resolution and audio availability also vary. Review the visible controls rather than assuming that settings will carry over unchanged when you switch models.
The estimated credit cost updates with the selected model and parameters. Check it before submitting the generation.
Step 5: Generate, Review, and Refine
Generation commonly takes minutes, depending on the model, settings, and queue. When processing finishes, review the MP4 for subject consistency, facial stability, product shape, camera movement, and distracting background changes.
If a face, logo, or object changes too much, reduce the motion. Replace “turn quickly toward the camera while walking” with “small head turn and gentle blinking.” If the camera movement feels uncontrolled, request one clear action such as “slow push-in” or “pan gradually from left to right.”
Change one variable at a time. Adjusting the prompt, model, duration, and resolution simultaneously makes it difficult to identify which change improved the result. Failed generation jobs are configured to return the charged credits automatically.
Once the result is suitable, download the MP4. Paid-plan videos can be used for commercial projects such as advertisements, product pages, social campaigns, and client deliverables, subject to your rights in the source material.
Practical Ways to Use Generated Videos
E-commerce teams can animate product photographs with controlled rotations, moving reflections, gentle zooms, or floating effects. Restrained motion usually works better when a logo, label, or precise product silhouette must remain stable.
Portrait creators can add blinking, a small head turn, soft hair movement, or a gradual lighting transition. Group photographs and large body movements are less predictable, so subtle animation is a sensible starting point.
Artists can introduce drifting clouds, moving fabric, swaying plants, rain, smoke, or changing light to an illustration. Marketers can repurpose existing campaign photography into several platform-specific clips without arranging a new shoot for every format.
Tips for More Reliable Results
- Use one clear subject: A prominent person or object gives the model a stronger visual anchor.
- Write motion-focused prompts: Describe subject action, camera direction, and atmosphere rather than repeating visible details.
- Begin with restrained movement: Small movements are more likely to preserve faces, text, logos, and product geometry.
- Preview economically: Start with the lowest-cost valid duration and resolution, then raise quality after the motion works.
- Respect model differences: Recheck the available ratio, duration, resolution, frame, and sound controls whenever you switch models.
- Build variations separately: Give each photograph its own prompt instead of expecting one instruction to suit an entire image collection.
Final Thoughts
A photo to video AI generator is most useful when it becomes part of an iterative creative workflow. The source photo establishes the visual identity, the prompt directs the motion, and the selected model determines which technical controls are available.
Start with a clean image and one understandable movement. Review the first generation, simplify unstable actions, and increase output quality only after the direction feels right. That approach turns AI video generation from a novelty into a practical way to produce social, marketing, artistic, and e-commerce content.