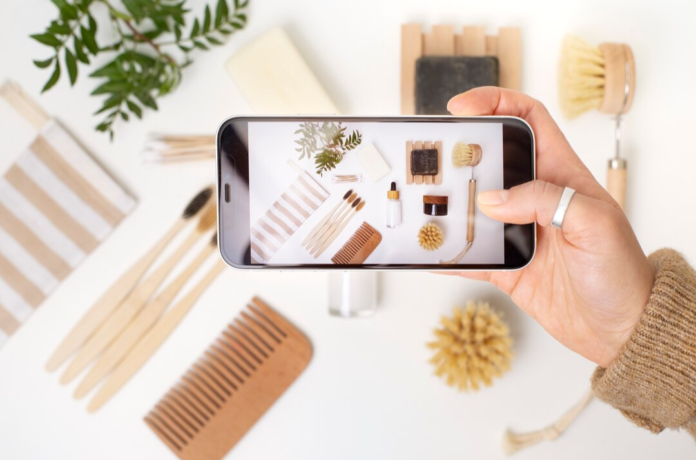

Social media has turned into a full-blown sales channel. Instagram, TikTok, and Pinterest are no longer just places where people scroll for entertainment. They are where purchasing decisions happen. A potential customer sees a product styled beautifully in their feed, taps through, and buys it within 90 seconds. That entire journey from discovery to purchase starts with one thing: the photo. And the difference between a product photo that generates revenue and one that gets scrolled past is almost never the product itself. It is how that product is styled, lit, and presented.
Whether you are running an ecommerce brand, selling handmade goods, or promoting products as a content creator, learning how to style and photograph products for social media is one of the most valuable skills you can develop right now. Here is how to do it without a professional studio, an expensive camera, or a degree in visual arts.
The Surface Sets the Tone Before Anything Else
Before you think about camera angles, lighting, or props, you need to think about what your product is sitting on. The surface or backdrop underneath a product is the first thing the viewer’s brain processes, even before they consciously register the product itself. A textured marble surface instantly communicates luxury. A warm wood grain surface says handcrafted and authentic. A clean white surface screams modern and minimal. Get the surface wrong, and no amount of editing can fix the disconnect.
This is why creators and small brands have moved away from shooting on kitchen counters, bedsheets, and random tabletops. Purpose-built photography surfaces designed for product and content photography have become essential gear. Companies like Best Ever Backdrops offer double-sided, waterproof boards with realistic textures that let you switch between looks in seconds. One side might be a dark slate for moody beauty shots, the other a light oak for bright lifestyle content. For anyone producing content regularly, this kind of flexibility removes one of the biggest friction points in the shooting process.
Think of your surface as the outfit your product is wearing. You would not put a luxury skincare serum on a scratched plastic table, just like you would not wear a tailored suit with dirty sneakers. The pairing needs to make sense, and it needs to be intentional.
Lighting That Looks Expensive but Costs Almost Nothing
Lighting is the single most impactful variable in product photography, and the good news is that the best light source is completely free. Natural window light remains the gold standard for product photos that look clean, professional, and inviting. The reason is simple: window light is diffused, directional, and creates soft shadows that give products a three-dimensional quality that flash and overhead room lighting simply cannot replicate.
Position your shooting surface near a window, ideally one that does not receive direct sunlight during your shooting time. North-facing windows are ideal because they provide consistent, even light throughout the day. If the sunlight is too harsh, a white curtain or even a white bedsheet taped over the window acts as a diffuser. On the opposite side of your setup, place a white foam board to bounce light back into the shadow areas. This reflector technique fills in harsh shadows and creates a more balanced, flattering look.
For creators who need to shoot after dark or in spaces with limited natural light, a single LED panel with adjustable color temperature is a worthwhile investment. Quality options from brands like Neewer and Viltrox are available for under $60 and can mimic the quality of window light when positioned correctly. The key is to use one light source positioned to the side or slightly behind the product, just like a window would be.
Composition Rules That Make Anything Look Professional
You do not need to understand advanced photography theory to compose a product shot that looks polished. Three simple principles will cover the vast majority of social media product photography needs.
First, the rule of thirds. Imagine your frame divided into a three-by-three grid. Place your product at one of the four points where the lines intersect, rather than dead center. This creates a more dynamic and visually engaging composition that draws the eye naturally. Every smartphone camera has a grid overlay option in the settings, so turn it on and use it.
Second, use negative space intentionally. Negative space is the empty area around your product. It gives the viewer’s eye room to breathe and draws attention to the hero item. Resist the urge to fill every corner of the frame with props or text overlays. Clean, spacious compositions consistently outperform cluttered ones in engagement metrics.
Third, choose the right angle for the product category. Flat-lay shots from directly overhead work best for flat or spread-out items like jewelry, cosmetics, stationery, and food. A 45-degree angle works well for bottles, jars, and products with interesting packaging. Straight-on eye-level shots are ideal for products with height and dimension like candles, shoes, and drinkware.
Prop Styling That Tells a Story Without Distracting
Props are the supporting cast of your product photo. They create context, tell a story, and help the viewer imagine the product in their own life. But the most common mistake in product styling is using too many props or choosing props that compete with the product for attention.
The golden rule of prop styling is simple: every prop should answer one question. Does this help the viewer understand how, when, or where this product is used? If the answer is no, remove it. A coffee brand photograph might include a book and reading glasses to suggest a morning ritual. A skincare product might be styled with a few fresh leaves or a linen towel to communicate natural ingredients and self-care. A candle might sit next to a match and a small dried flower to evoke coziness.
Keep your prop palette neutral and cohesive. Whites, creams, natural wood tones, greens, and muted earth tones work universally well because they support without competing. Avoid anything shiny or highly reflective, as these create distracting highlights that pull focus away from the product. Thrift stores, dollar stores, and your own kitchen are the best sources for affordable, photogenic props.
The Phone Camera Settings Most People Overlook
Modern smartphones are more than capable of producing professional-quality product images, but most people use them incorrectly for this purpose. A few simple setting adjustments can dramatically improve your results.
Lock your exposure and focus by tapping and holding on the product in your camera app. This prevents the camera from constantly readjusting between shots, which creates inconsistent exposures across a set of images. Slightly underexpose your images by dragging the exposure slider down after locking focus. It is much easier to brighten a slightly dark image in editing than to recover blown-out highlights from an overexposed one.
Use the main lens, not the wide-angle or ultrawide lens. The main camera on most phones produces the sharpest images with the least distortion. If your phone has a 2x telephoto lens, try using that for product shots as well, because the slight compression it introduces makes products look more natural and less stretched than wide-angle shots. Always clean the lens with a microfiber cloth before shooting. Fingerprints and smudges create a hazy, soft look that no amount of sharpening in post-production can fully fix.
Editing That Enhances Without Overdoing It
The editing trend in 2026 has shifted firmly toward clean, accurate, and minimally processed images. Heavy filters, extreme saturation, and dramatic vignettes look dated and can actually undermine trust. Consumers have become sophisticated enough to recognize over-processed images, and they associate heavy editing with misleading product representation.
The editing adjustments that matter most are white balance correction to ensure colors are accurate, a slight exposure boost to keep the image bright and inviting, a small increase in contrast to add depth, and a subtle clarity or texture bump to make surface details pop. These four adjustments take less than a minute per image and produce results that look polished without looking artificial.
Lightroom Mobile is the most popular editing tool among product photographers because its preset system allows you to save a set of adjustments and apply them to every image with a single tap. This ensures visual consistency across your feed, which is critical for brand recognition. If you are posting product content regularly, developing a signature editing style that you apply consistently will make your feed look curated and professional.
Platform-Specific Strategies That Boost Performance
Not all social media platforms treat product photos the same way. Understanding the nuances of each platform helps you optimize your content for maximum reach and engagement.
Instagram rewards visual consistency and aesthetic cohesion. Your product photos should fit within a consistent visual theme when viewed as a grid. Think of your Instagram profile as a storefront window. If the visual presentation is inconsistent, browsers keep walking. Single-image posts, carousels showing the product from multiple angles, and Reels showing the styling process all perform well, but the visual quality standard needs to remain high across all formats.
Pinterest is a search engine as much as it is a social platform. Vertical images with a 2:3 aspect ratio perform best. Text overlays with clear, benefit-driven messaging increase save rates. And keyword-rich descriptions matter as much as the visual itself. For product sellers, Pinterest drives high-intent traffic because users are actively searching for products and ideas rather than passively scrolling.
TikTok has shifted product photography toward motion. Short videos showing a product being unboxed, styled, or used in context outperform static images on the platform. The aesthetic still matters, though. Even in video format, the surface, lighting, and styling choices that make still photography work are equally important in creating video content that converts.
Building a Shooting Routine That Scales
The creators and brands that produce the most engaging product content are not necessarily the most talented photographers. They are the ones who have built efficient, repeatable shooting routines. Rather than approaching each photo as a one-off creative project, they systematize the process so they can produce a week’s worth of content in a single focused session.
A practical shooting routine starts with batching. Choose one day per week as your content shooting day. Set up your lighting and surface once, then photograph multiple products in sequence. Change surfaces and props between sets to create visual variety, but keep the lighting position and camera settings consistent. This approach typically yields 15 to 25 polished images in a two-hour session, which is more than enough for a week of posting across multiple platforms.
Batch your editing as well. Import all images into Lightroom or your preferred editing app and apply your preset to the entire batch. Then make minor individual adjustments as needed. This assembly-line approach reduces the total time spent on content production while maintaining consistent quality.
Final Thoughts
The products that sell on social media are not always the best products. They are the best-presented products. That might sound cynical, but it is also an opportunity. If your product is genuinely good, presenting it well is not manipulation. It is doing the product justice. The tools and techniques required to create scroll-stopping product imagery are accessible, affordable, and learnable. A good surface, natural light, intentional composition, and minimal editing are all it takes to produce images that compete with brands spending thousands on professional studios.
The brands and creators winning on social media right now are not the ones with the biggest budgets. They are the ones who treat every product image as a selling opportunity and invest the time and intention to get it right. Start with your next post. Style it deliberately, light it properly, shoot it on a surface that matches the story you want to tell, and watch the difference it makes.