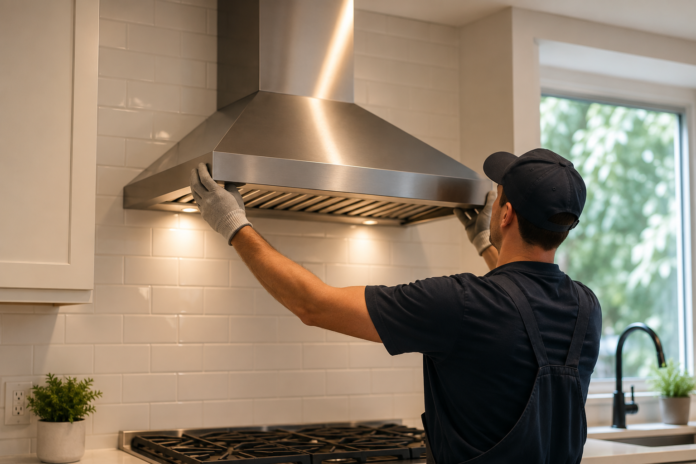

A kitchen hood is one of the most important pieces of equipment in any cooking space, whether it sits above a home stove or anchors a busy commercial kitchen. It pulls smoke, grease, heat, and odors out of the air, protects your ceiling and cabinets from grease buildup, and helps keep the kitchen comfortable to work in. Yet many homeowners and business owners underestimate how much planning and precision goes into a proper installation. A poorly installed hood can lead to weak ventilation, fire code violations, unpleasant odors that linger, and costly repairs down the line.
This guide walks through everything you need to know about installing a kitchen hood, from choosing the right unit to the final testing stage. Whether you are updating a home kitchen or outfitting a restaurant, understanding the process will help you make smarter decisions, even if you ultimately hire a professional to do the work. If you would rather leave the job to experts from the start, CRS Hoods, a trusted provider of Hood installation, Wilmington, can handle everything from planning to final inspection.
Why Proper Kitchen Hood Installation Matters
Before getting into the steps, it helps to understand why installation quality matters so much. A kitchen hood is not just a decorative fixture bolted above your stove. It is a ventilation system that needs to be sized correctly, sealed properly, and vented to the outside in a way that meets local building codes.
When a hood is installed incorrectly, several problems can surface:
- Grease and moisture can build up in walls or ceilings, creating fire hazards
- Poor airflow can leave smoke and odors trapped inside the kitchen
- Ductwork that is too long, too narrow, or has too many bends can drastically reduce suction power
- Improper electrical connections can trip breakers or create shock hazards
- Non-compliant installations can fail inspections, which is especially critical for restaurants and commercial kitchens
For commercial kitchens in particular, hood systems must often meet strict fire suppression and ventilation codes. This is why many restaurant owners choose to work with specialists who understand both the mechanical and regulatory sides of the job in Wilmington, Delaware and make sure your system is compliant, efficient, and built to last.
Types of Kitchen Hoods
Not all kitchen hoods are the same, and the installation process varies depending on the type you choose.
1. Ducted Range Hoods
These hoods vent air directly outside through ductwork. They are the most effective option because they physically remove smoke, grease particles, and odors from the building rather than filtering and recirculating the same air.
2. Ductless Range Hoods
These use charcoal or carbon filters to clean the air before releasing it back into the kitchen. They are easier to install since no external venting is required, but they are less powerful and need regular filter replacement.
3. Under-Cabinet Hoods
Mounted beneath a cabinet above the stove, these are common in residential kitchens with limited space.
4. Wall-Mounted Hoods
Installed directly on the wall above the range, often used when there are no upper cabinets.
5. Island Hoods
Suspended from the ceiling above a kitchen island. These require more structural planning since they hang without cabinet support.
6. Commercial Exhaust Hoods
Used in restaurants and food service kitchens, these are heavy duty systems built to handle high volumes of grease and heat, often paired with make-up air systems and fire suppression equipment.
Tools and Materials You Will Need
For a basic residential installation, you will typically need:
- The range hood unit and manufacturer instructions
- Ductwork (rigid or semi-rigid metal duct is preferred over flexible duct)
- Roof or wall cap for exterior venting
- Screws, brackets, and mounting hardware
- Drill and drill bits
- Stud finder
- Tape measure and level
- Jigsaw or hole saw (for cutting duct openings)
- Wire connectors and electrical tools
- Caulk or sealant for weatherproofing exterior vents
- Ladder
Commercial installations require additional equipment, specialized fire suppression components, and licensed professionals to meet code requirements, which is why most commercial kitchens do not attempt a do it yourself approach.
Step-by-Step Installation Process
Step 1: Choose the Right Hood Size and CFM Rating
CFM stands for cubic feet per minute, and it measures how much air the hood can move. As a general rule, your hood should provide at least 1 CFM for every 100 BTUs your stove produces, or roughly 100 CFM for every 10,000 BTUs of cooking power. Wider ranges and commercial equipment need significantly higher CFM ratings.
Measure the width of your cooking surface as well. A hood should typically be as wide as or slightly wider than the range below it to capture smoke and steam effectively.
Step 2: Plan the Duct Path
Decide how the ductwork will travel from the hood to the outside of the building. The shortest, straightest path is always best. Every bend or elbow in the ductwork reduces airflow efficiency, so try to minimize turns and avoid unnecessarily long runs.
You will also need to decide whether the vent will exit through the roof or an exterior wall. Roof venting is often more efficient but harder to install, while wall venting is simpler for most residential projects.
Step 3: Turn Off Power and Prepare the Area
If you are replacing an existing hood, shut off the electrical breaker connected to the unit before removing anything. Clear the countertop below and protect the stove and surrounding surfaces from dust and debris.
Step 4: Remove the Old Hood (If Applicable)
Disconnect the wiring, remove mounting screws, and carefully take down the old unit. Inspect the existing ductwork for grease buildup, damage, or improper sizing that may need to be corrected before installing the new hood.
Step 5: Mark and Cut the Duct Opening
Using the manufacturer’s template, mark where the duct opening needs to be cut, whether through the wall or ceiling. Use a stud finder to avoid cutting into structural framing, wiring, or plumbing. Cut the opening carefully with a jigsaw or hole saw.
Step 6: Install the Ductwork
Run rigid or semi-rigid ductwork from the hood location to the exterior vent cap. Seal every joint with metal tape or mastic sealant, not standard duct tape, which degrades over time from heat and grease exposure. Secure the exterior vent cap and seal around it with caulk to prevent water intrusion.
Step 7: Mount the Hood
Depending on the type of hood, this may involve:
- Securing brackets to wall studs or ceiling joists
- Lifting the hood into place (a second person is helpful here)
- Attaching the hood securely with screws rated for the unit’s weight
- Connecting the hood to the ductwork with a transition connector
Always use a level to make sure the hood is mounted evenly, since an uneven hood can affect both appearance and airflow.
Step 8: Complete Electrical Connections
Connect the hood’s wiring to your home’s electrical system according to the manufacturer’s instructions. This typically involves matching black to black, white to white, and connecting the ground wire. If you are not confident working with electrical wiring, this is a good point to bring in a licensed electrician.
Step 9: Install Filters and Attach the Duct Cover
Insert the grease filters and, if applicable, attach the decorative duct cover that conceals the ductwork between the hood and the ceiling.
Step 10: Test the System
Restore power and turn on the hood. Check that the fan runs smoothly, the lights function, and air is being pulled through the vent properly. Hold a piece of tissue paper near the exterior vent cap to confirm air is flowing outside. Listen for unusual rattling or vibration, which may indicate loose mounting hardware or an unbalanced fan.
Common Mistakes to Avoid
- Undersizing the hood. A hood that is too small or has too low a CFM rating will not effectively capture smoke and grease.
- Using flexible foil duct. While inexpensive, this type of duct restricts airflow and is more prone to sagging, tearing, and grease accumulation.
- Too many bends in the ductwork. Each turn reduces suction power. Try to keep duct runs as straight as possible.
- Improper sealing. Gaps in ductwork or around exterior vent caps can lead to leaks, drafts, and reduced efficiency.
- Ignoring make-up air requirements. High powered hoods can create negative pressure in a home, which may cause backdrafting of gas appliances or fireplaces if make-up air is not addressed.
- Skipping permits for commercial installations. Commercial kitchens almost always require permits, inspections, and compliance with fire codes, which is why professional installation is strongly recommended.
When to Call a Professional
While an experienced do it yourselfer can often manage a straightforward residential under-cabinet hood installation, there are situations where professional help is essential:
- Commercial kitchen installations that require fire suppression system integration
- Roof penetrations for venting
- Complex or lengthy duct runs
- Homes with limited attic or wall access
- Any project requiring permits or code compliance verification
- Electrical work beyond basic wiring knowledge
For restaurants, cafes, and other food service businesses, working with a specialist who understands local fire and health codes is not optional, it is a necessity. A trusted provider of Hood installation, Wilmington services can evaluate your kitchen layout, calculate proper airflow requirements, and ensure your system passes inspection the first time.
Maintaining Your Kitchen Hood After Installation
Once your hood is installed, regular maintenance keeps it working efficiently:
- Clean or replace grease filters every one to three months depending on cooking frequency
- Wipe down the exterior and interior surfaces regularly to prevent grease buildup
- Inspect ductwork periodically for grease accumulation, especially in commercial kitchens where buildup happens faster
- Test the fan and lights periodically to catch issues early
- Schedule professional duct cleaning for commercial systems as required by local fire codes
Final Thoughts
Installing a kitchen hood involves more than mounting a box above your stove. It requires careful planning around airflow, ductwork routing, electrical connections, and code compliance. For a simple residential upgrade, a confident do it yourselfer with the right tools can often complete the job in a weekend. For commercial kitchens, where the stakes involve fire safety, health inspections, and daily high volume cooking, professional installation is the safer and smarter choice.
If you want the job done right the first time, especially for a restaurant or commercial kitchen, reach out to a team that specializes in commercial kitchen ventilation to get expert guidance from planning through final inspection.
Frequently Asked Questions
1. How much does it cost to install a kitchen hood?
Costs vary widely depending on the type of hood, ductwork complexity, and whether it is a residential or commercial installation. A basic residential under-cabinet hood might cost a few hundred dollars in materials and labor, while commercial exhaust systems with fire suppression can run into the thousands due to the specialized equipment and code requirements involved.
2. Can I install a kitchen hood myself?
For simple residential installations with accessible ductwork, many homeowners with basic tool skills can complete the job. However, projects involving roof venting, complex electrical work, or commercial kitchen requirements are best left to licensed professionals to ensure safety and code compliance.
3. What size hood do I need for my stove?
As a general guideline, your hood should be at least as wide as your cooktop, and its CFM rating should match your stove’s BTU output. A common formula is 1 CFM for every 100 BTUs, though commercial kitchens often require much higher airflow based on cooking volume and equipment type.
4. Do I need a permit to install a kitchen hood?
Residential installations sometimes do not require permits, though this depends on local building codes, especially if new wiring or exterior venting is involved. Commercial kitchen hood installations almost always require permits and inspections due to fire safety regulations.
5. How long does kitchen hood installation take?
A straightforward residential installation typically takes a few hours to a full day, depending on whether new ductwork needs to be run. Commercial installations can take several days to weeks, factoring in permitting, fire suppression integration, and inspection scheduling.
6. Why is my new kitchen hood not pulling smoke effectively?
Weak airflow is often caused by undersized CFM ratings, excessive bends in the ductwork, use of flexible foil ducting instead of rigid duct, or blockages in the exterior vent cap. Checking these factors, or having a professional inspect the system, can usually resolve the issue.