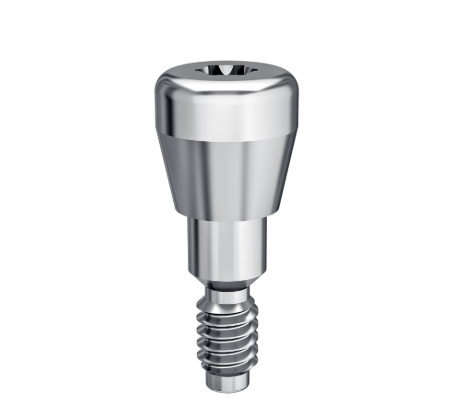

A healing abutment protects the implant connection during transmucosal healing and helps establish the soft tissue opening for the restorative phase. Selecting one requires more than choosing a component that appears to cover the implant platform.
Connection, platform, tissue height, diameter, contour, and restorative plans all affect the choice. The following six checks can help clinicians prepare the correct component before surgery or second-stage exposure.
1. Confirm the Implant System
The component must match the implant’s connection and platform. Similar-looking parts may have different internal geometries, thread designs, or seating surfaces.
Confirm:
- Manufacturer
- Implant line
- Connection type
- Platform
- Implant diameter
- Product reference
- Required driver
Internal hex and conical components should not be treated as interchangeable. The connection must be verified through reliable records rather than appearance alone.
When the implant was placed at another practice, request surgical notes, product labels, radiographs, and any implant identification information before ordering a component.
2. Measure the Tissue Height
The selected component should extend through the soft tissue enough to remain accessible without creating unnecessary projection.
A component that is too short may become covered by tissue or be difficult to access. One that is too tall may interfere with the opposing dentition, provisional prosthesis, or patient comfort.
Tissue thickness should be assessed at the implant site. The clinician should also consider expected postoperative swelling and tissue changes during healing.
Available heights vary by implant system and design, so the measurement must be matched to the manufacturer’s listed dimensions.
3. Select a Suitable Diameter
The diameter influences the tissue opening that develops around the component. It should relate to the implant platform, site, available soft tissue, and intended restorative contour.
A narrow posterior healing component may not provide the desired tissue form for a wider restoration. An unnecessarily wide component can place pressure on soft tissues or complicate closure.
The clinician should evaluate:
- Mesiodistal space
- Buccolingual tissue volume
- Distance from adjacent teeth or implants
- Planned crown or prosthetic contour
- Required access for cleaning
- Tissue condition
Diameter should be selected as part of the restorative plan, not solely according to the implant body diameter.
4. Match the Component to the Restorative Plan
Clinicians reviewing Healing caps should confirm the implant connection, platform, component diameter, height, contour, and planned restoration before placement.
The desired tissue form may differ between an anterior crown, posterior crown, bridge, or overdenture component. A standard cylindrical design may suit one site, while another case may require a different emergence contour.
Selection should account for the provisional and definitive restorative workflow. The healing component should support the next stage rather than create a tissue form that must later be corrected.
5. Check Clearance and Prosthesis Contact
A healing abutment should not create uncontrolled occlusal contact. Clearance must be checked against the opposing dentition during closure and excursive movement.
If the patient wears a removable provisional prosthesis, its fitting surface should be relieved so it does not press on the component or surgical site. Pressure from a denture can disturb the soft tissues and transfer force to the implant during healing.
Before dismissing the patient, verify:
- Complete seating
- Soft tissue relationship
- Occlusal clearance
- Provisional prosthesis relief
- Patient comfort
- Access for hygiene
The patient should receive instructions not to adjust the prosthesis or component at home.
6. Verify Seating and Document the Part
Soft tissue, bone, debris, or connection damage can prevent complete seating. The implant connection should be inspected and cleaned according to the clinical situation and manufacturer’s instructions before the component is inserted.
Use the correct driver and follow the manufacturer’s specified handling and tightening instructions. Do not substitute a general torque value from another implant system.
Radiographic verification may be appropriate when seating cannot be confirmed clinically or when the connection is below the tissue level.
Record:
- Component type
- Connection and platform
- Diameter
- Height
- Product reference
- Driver used
- Placement date
- Clinical observations
Accurate documentation helps the restorative team identify the component at the next appointment.
Prepare for the Restorative Phase at Placement
Healing-component selection influences access, tissue contour, provisional-prosthesis relief, and the later restorative workflow. The required sizes should be confirmed and available before the surgical appointment or implant exposure.
Checking the system, tissue height, diameter, restorative plan, clearance, and seating gives the clinician a clear basis for selection. It also reduces the chance of replacing the component because an essential dimension was overlooked.